One of the things I learned today was that Lightroom Classic has a 'Teeth Whitening' effect. Allow me to share this with you in case you too were unaware of this feature.
First, launch Lightroom Classic, I'm using the 9.2.1 release by the way, and bring up a picture that you've noticed needs a some yellowing or staining removed from teeth. Once opened, go to Develop mode and zoom into to the mouth area. In the picture below, notice the Adjustment Brush icon (I've drawn an orange box around it to make it stand out for you).

Click on the adjustment brush. You will notice that the Develop panels (Basic, Tone Curve, etc.) move down and in its place should be a panel section with Mask at the top. Just below that is a section called Effect. The effect listed when I arrived here was 'Exposure'. Click on Exposure - I suspect this is the default, but in case it is not, click on whatever you see in your panel as indicated by the orange box below.

Once you select the effect, a list of other effects will appear -- one of them is 'Teeth Whitening' - see below (in the orange box). Click on 'Teeth Whitening'.

If this is your first time in this section, as it was for me, I was pleasantly surprised at all the things I can do with the various adjustment brushes. I'm sure I'll be back soon to see what I can do with Iris Enhance and Soften Skin; that will be for another day, but I suspect the Adjustment Brush and I will become close friends.
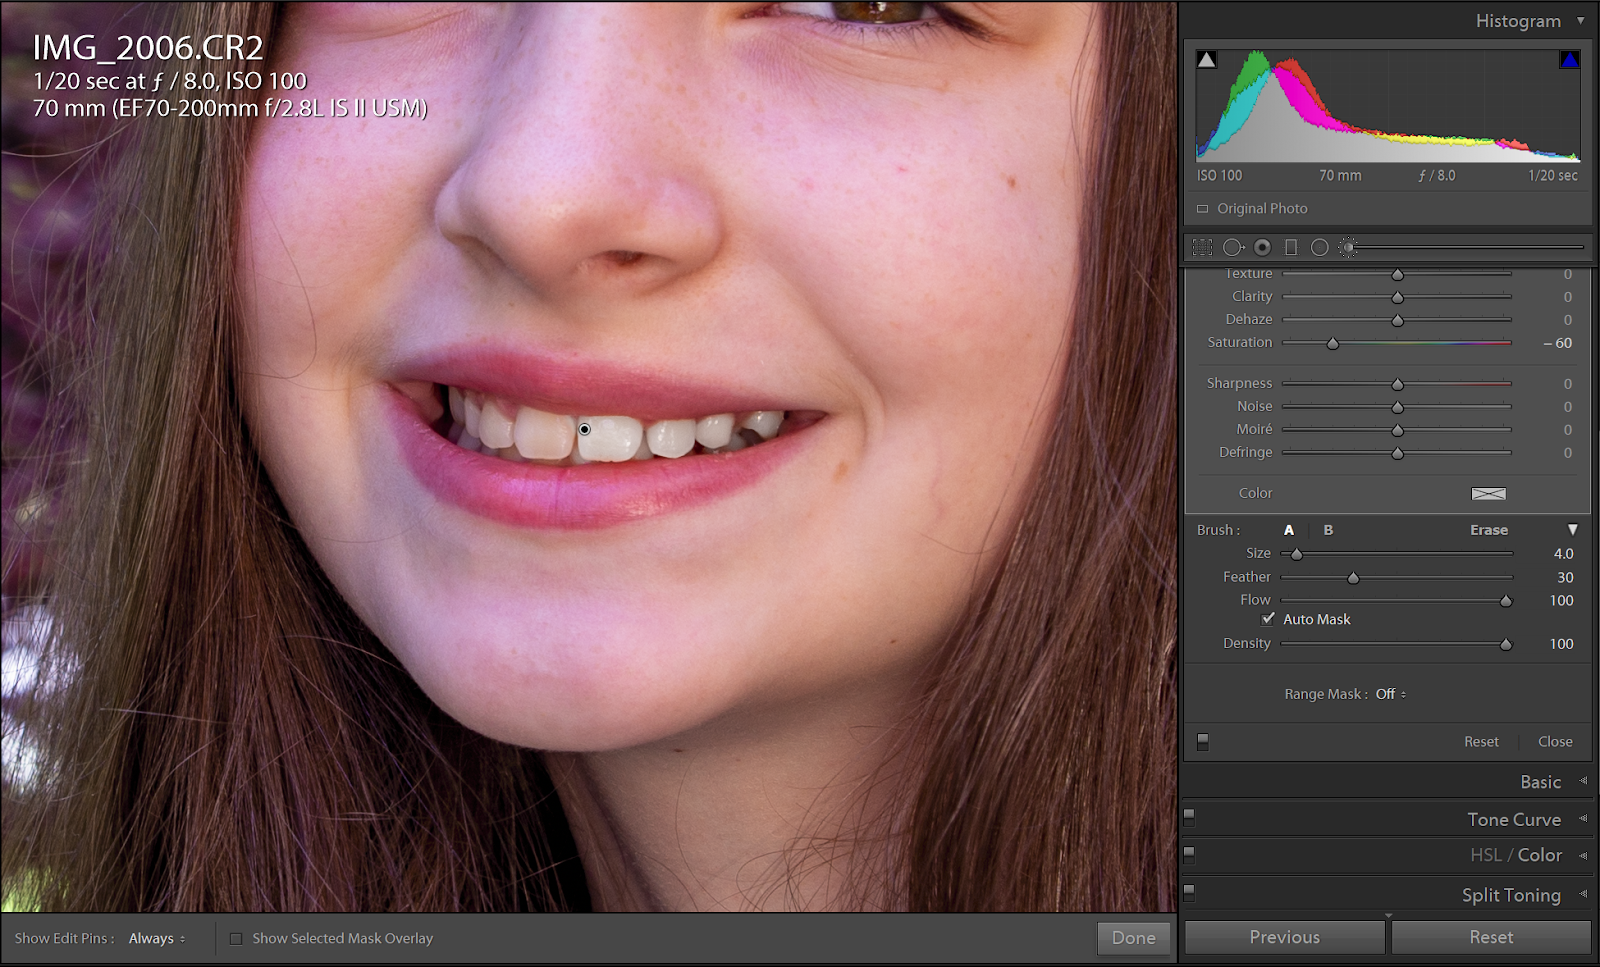
Once selected, you'll notice the panel settings are as follows: Exposure at .4, Saturation at -60, Brush Size at 4.0, Feather at 62, Flow at 100, Density at 100, and everything else at 0. Auto Mask will also be checked. These settings worked well for me, but you may need to play around with the exposure and saturation settings if the teeth become either not white enough or too bleached out. You may also need to change the brush size and feathering level to account for the mouth you are working with - I like a bit more control with the feathering, so I lowered it to 30.
Now, hover the mouse pointer over the picture. Notice that the pointer is now shown as a circled crosshair. This is your paintbrush, using the mouse, left click on a tooth that needs whitening and begin to paint it and adjacent teeth that need this treatment. When you release the mouse button, check to see if the teeth are an appropriate shade of white for the subject. If the effect does not look realistic, undo the change - choose Edit|Undo Add Brush Stroke (or a Ctrl/Cmd Z) and then play around with the exposure and saturation settings to get a color that works best for your picture. Once you have settings that work for you, paint the teeth - be sure not to get the lips, tongue, etc. or they too will have the same effect; but if you do get beyond the teeth, undo and try again. When finished, be sure to click the 'Done' button located just below the picture on the far right.
In the picture above you can easily see the before and after effect. The teeth on the right side of this young girl's mouth have been whitened, while the teeth on the left side have been left alone. Below is the finished product.

As I learn more about photo-editing and other photography-related topics, I hope to share them with you. If this instruction was helpful, please let me know.
I hope you and your loved ones are safe and doing well.
- Andy